10 Easy Vintage Halloween DIY Crafts for Charming Spooky Fall Decor + Bonus Idea
Vintage Halloween decor has a personality that newer decorations often cannot replicate. Playful ghosts, faded orange pumpkins, old paper illustrations, handmade felt ornaments, and quirky little details can make fall decorating feel nostalgic without turning your home into a full haunted house.
Creating that look yourself also gives you freedom to mix Halloween themes with warmer autumn elements. Felt, clay, aged paper, yarn, recycled containers, and scraps from previous projects can all become seasonal decorations with a little imagination.
These vintage Halloween and fall DIY craft ideas range from simple garlands and miniature decorations to paper crafts and upcycled projects. Use traditional black and orange for a recognizable Halloween palette, or experiment with mustard, cream, rust, olive, burgundy, and dusty purple for a softer retro feel.
Felt Ghost and Bat Garland
Give a fireplace mantel or doorway a nostalgic Halloween touch with a handmade garland of felt ghosts and bats. The soft texture keeps the spooky shapes playful, while simple stitching adds the kind of handcrafted character associated with older seasonal decorations.
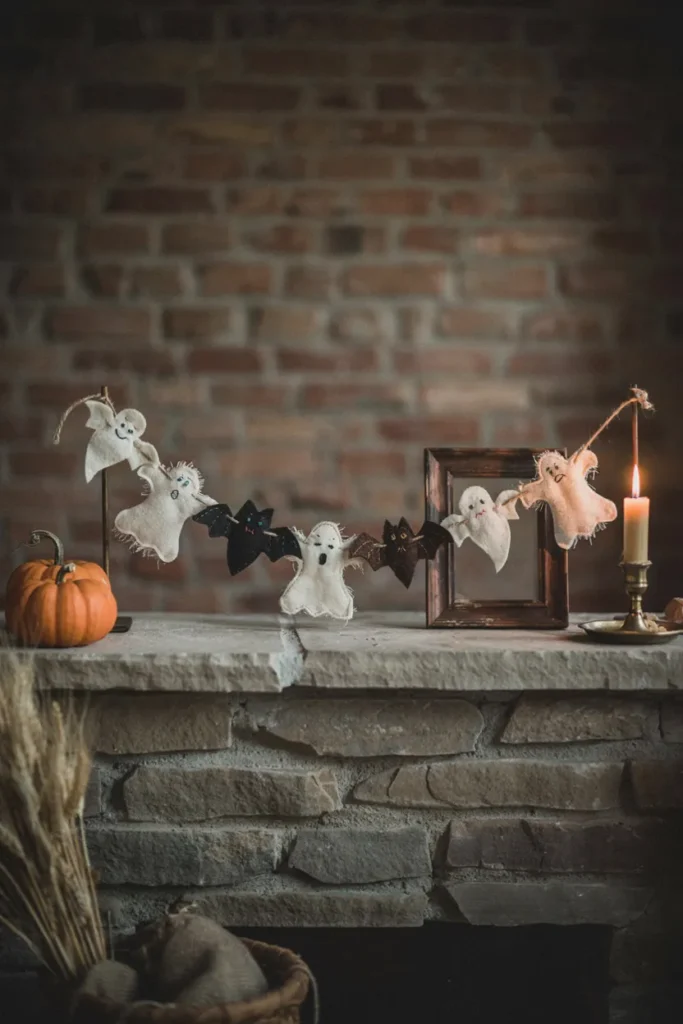
- Trace several ghost and bat shapes onto felt before cutting them out.
- Mix ivory ghosts with black, charcoal, or dark brown bats.
- Give each ghost a slightly different expression using embroidery thread.
- Attach the finished pieces to cotton string, ribbon, or rustic twine.
Leave a little space between each character so the individual shapes remain visible when the garland is hung. Slightly uneven stitching and varied silhouettes can actually improve the vintage effect by making the decoration feel collected and handmade rather than factory-produced.
Autumn Pumpkin Fairy
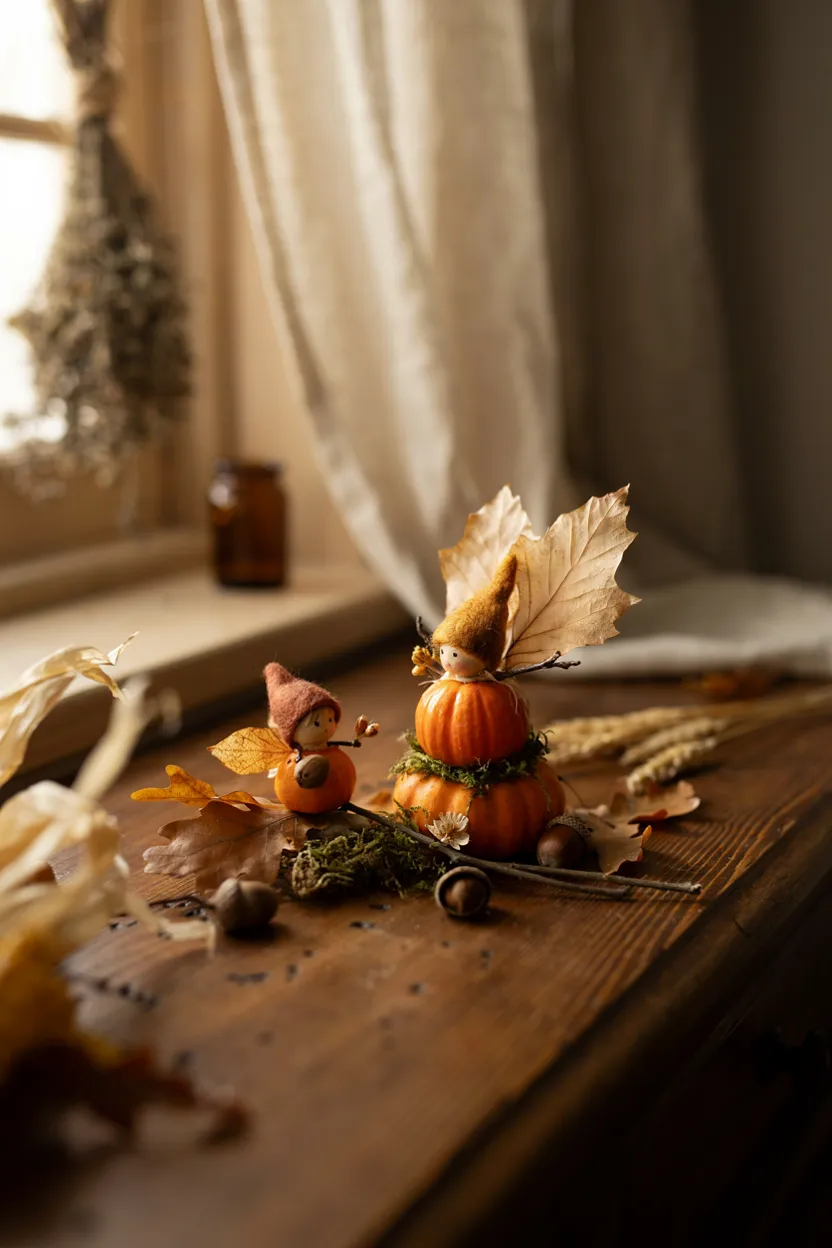
Create a tiny fall character by turning a miniature pumpkin into a whimsical pumpkin fairy. This craft combines Halloween imagination with woodland-inspired autumn decor, making it adorable for shelves, tables, seasonal displays, or a miniature fall village.
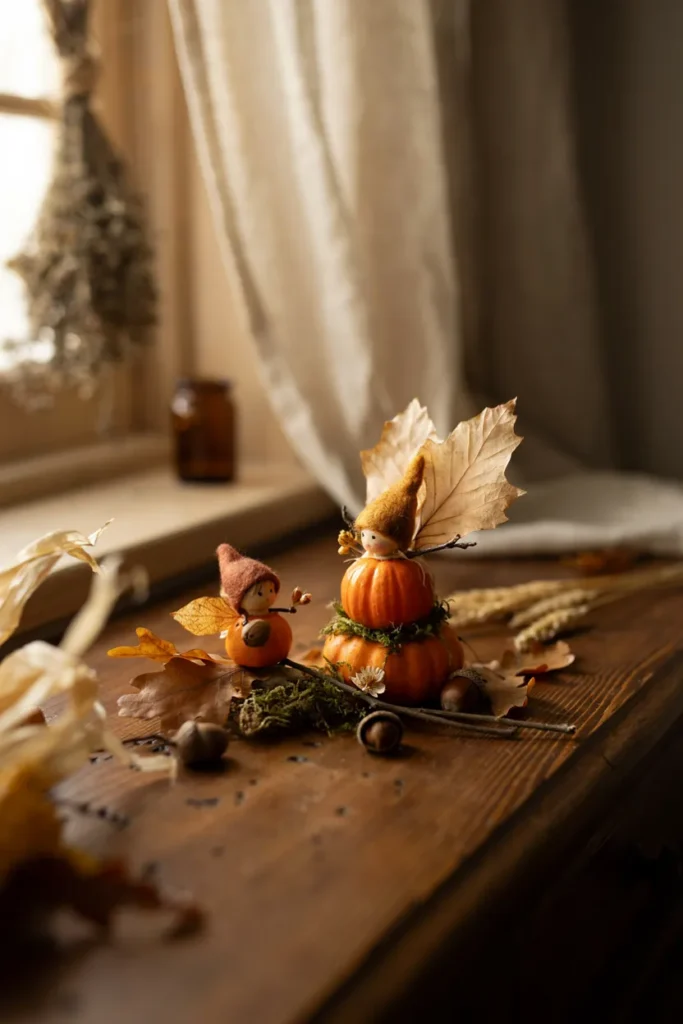
- Start with a miniature real or artificial pumpkin.
- Create delicate wings using paper, fabric, dried leaves, or translucent material.
- Use an acorn cap, felt cone, or tiny dried flower arrangement as a hat.
- Add small natural details such as moss, twigs, leaves, or seed pods.
Muted autumn colors can give the fairy an old storybook quality. Try dusty orange, moss green, brown, cream, and mustard instead of bright seasonal colors. Display several characters together if you want to create an entire enchanted pumpkin scene.
Clay Eyeballs
Handmade clay eyeballs bring just the right amount of weirdness to a vintage Halloween display. They can be made cute, creepy, or somewhere in between depending on the colors and expressions you choose.
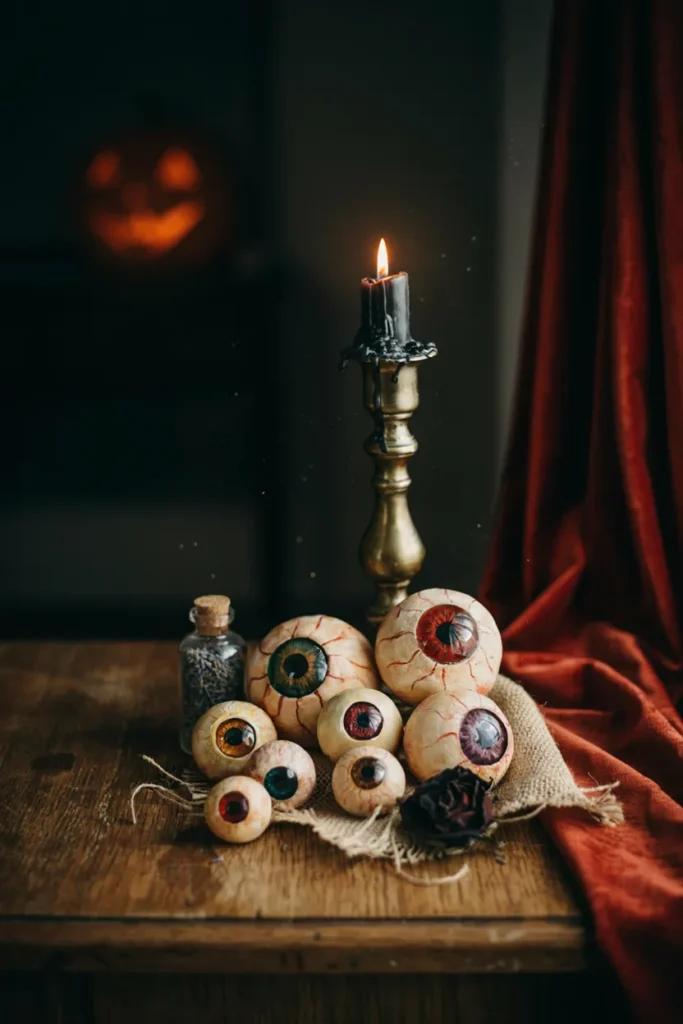
- Roll small pieces of air-dry clay into round eyeball shapes.
- Paint the base in warm white or cream rather than stark white for an aged appearance.
- Add colorful irises, dark pupils, and fine painted veins.
- Finish with subtle imperfections to give every eyeball its own personality.
Scatter the finished eyeballs inside an old bowl, arrange them beneath a glass cloche, or add them to a Halloween curiosity cabinet. Pairing them with vintage books, candlesticks, apothecary bottles, and dried botanicals can make the display feel delightfully strange.
Groovy Ghost Decorations
Move beyond traditional spooky ghosts with retro characters inspired by the playful style of the 1960s and 1970s. Rounded shapes, cheerful expressions, flowers, stars, and funky patterns can turn simple ghost decorations into colorful Halloween accents.
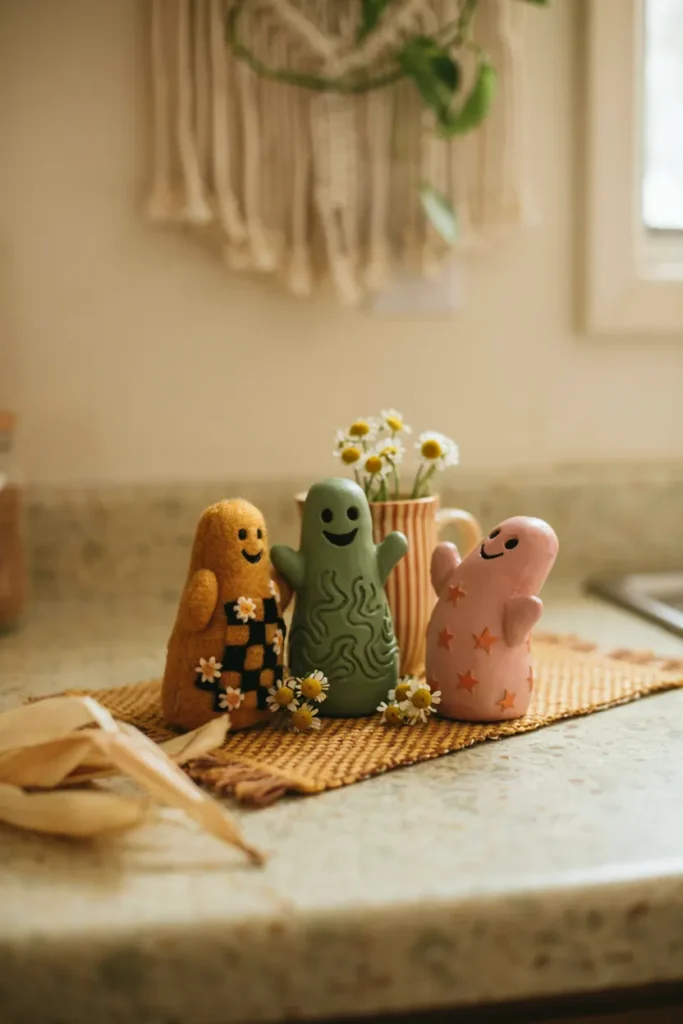
- Create ghost shapes from clay, felt, cardboard, or lightweight craft material.
- Add daisies, checkerboard patterns, stars, or wavy retro motifs.
- Experiment with orange, mustard, avocado green, pink, and purple accents.
- Give each ghost a different pose or expression for extra personality.
These little characters are ideal for anyone who prefers Halloween decor that feels fun rather than frightening. Arrange them among pumpkins and vintage accessories for a seasonal display with plenty of retro attitude.
Vintage Halloween Tassels
Decorative tassels are an easy way to bring texture and old-fashioned Halloween colors into your home. Combining yarn, ribbon, lace, fabric strips, and small seasonal embellishments creates a layered decoration that works beautifully on cabinets, baskets, doorknobs, or garlands.
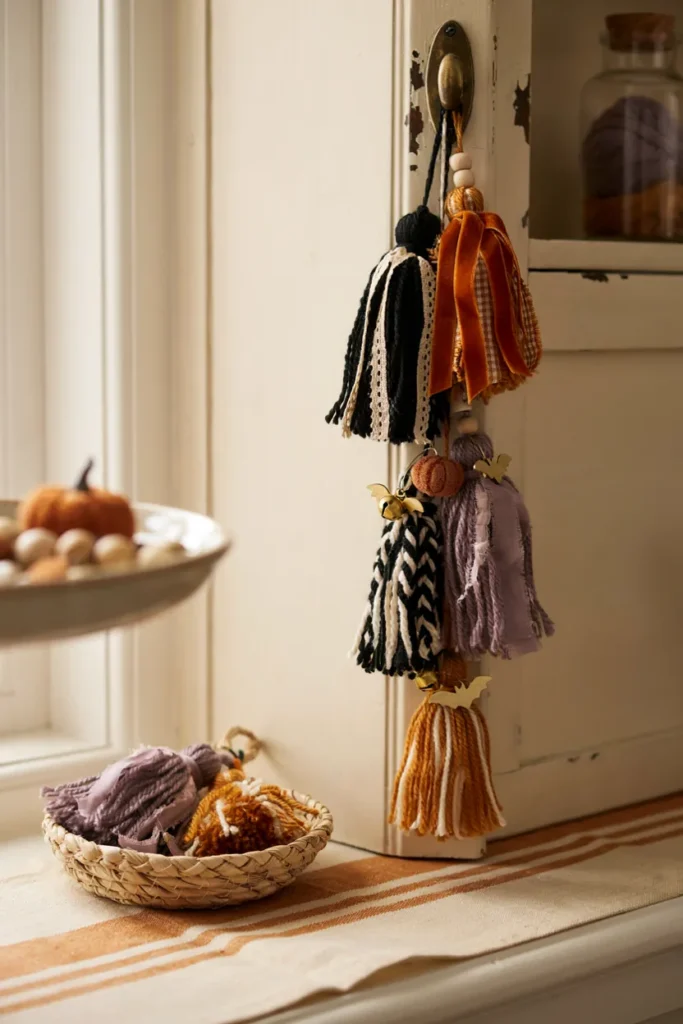
- Combine black, faded orange, cream, mustard, and muted purple fibers.
- Mix yarn with lace, velvet ribbon, gingham scraps, or torn fabric strips.
- Add miniature pumpkins, bells, wooden beads, or paper charms.
- Make several tassels in different lengths for a collected appearance.
Try using scraps left from previous projects instead of purchasing perfectly coordinated materials. A mixture of textures and slightly mismatched shades can give each tassel the layered character that makes vintage-inspired crafts so appealing.
Adult Felt Witch Hat and Matching Pet Hat
Make Halloween dressing more memorable with a classic felt witch hat for yourself and a miniature coordinating version for your pet. A slightly floppy silhouette and understated embellishments can give the hats a charming old Halloween postcard feel.
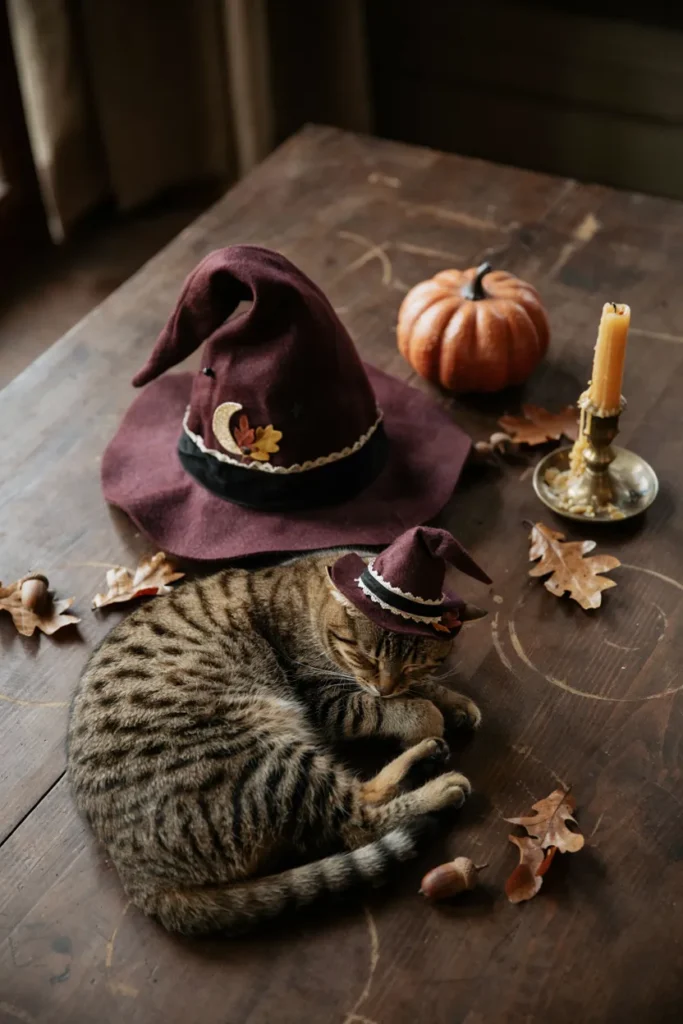
- Choose black, charcoal, brown, or deep plum felt for the main hat.
- Add a contrasting band made from velvet, ribbon, lace, or patterned fabric.
- Decorate with small fabric flowers, stars, moons, or autumn leaves.
- Keep the pet version lightweight, comfortable, and suitable for brief supervised wear.
The two hats do not need to be identical. Repeating one fabric, ribbon, or decorative detail is enough to make them feel coordinated. They can also become cute props for Halloween photos before the larger hat joins your seasonal decor.
Halloween Ephemera Art
Turn old-fashioned Halloween imagery into layered artwork using paper scraps, reproduction postcards, tickets, labels, book pages, and other ephemera. This project is a fun way to create wall decor that looks as though it came from a box of treasured seasonal keepsakes.
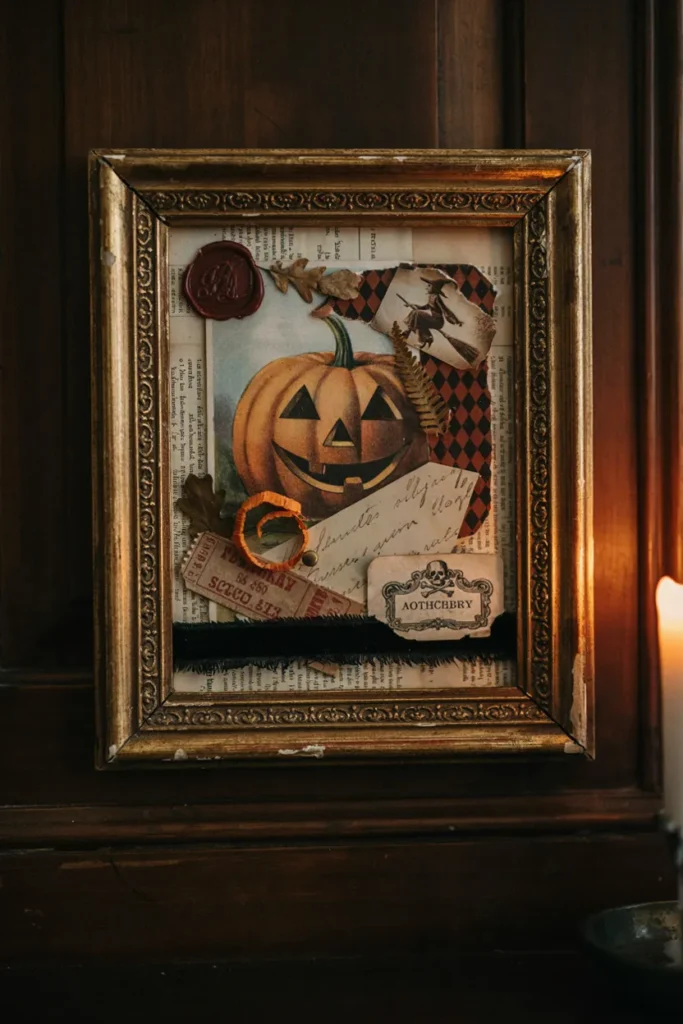
- Collect Halloween illustrations, patterned papers, labels, and typography pieces.
- Layer papers with torn or irregular edges rather than perfect rectangles.
- Add stamps, handwritten notes, ribbon, or small fabric pieces.
- Display the finished collage in an aged or thrifted frame.
Sepia, cream, black, faded orange, and muted green work especially well for an antique appearance. You can create one larger collage or make several smaller pieces to build a vintage Halloween gallery wall.
Retro Paper Halloween Candles
Create decorative paper candles inspired by old Halloween party decorations without relying on real flames. Striped paper, scalloped edges, smiling pumpkins, stars, and exaggerated flame shapes can give these pieces a charming retro personality.
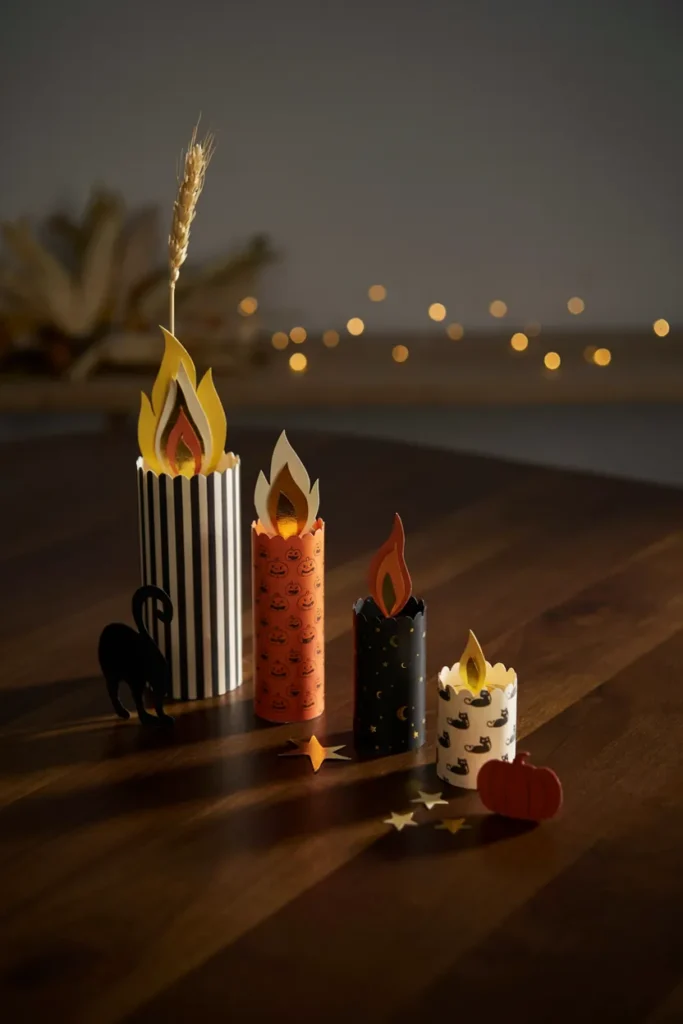
- Roll sturdy patterned paper or cardstock into candle-shaped cylinders.
- Cut layered flame shapes from yellow, orange, cream, or metallic paper.
- Decorate the candle bodies with stars, moons, cats, pumpkins, or stripes.
- Vary the heights to create a more interesting tabletop arrangement.
Group several paper candles on a mantel, console table, or party display and surround them with small pumpkins and paper decorations. Their handmade quality works particularly well with whimsical vintage Halloween themes.
Felt Fall Acorns
Soft felt acorns are a simple autumn craft that can stay on display well beyond Halloween. Their small size makes them useful as bowl fillers, garland decorations, wreath accents, place-setting details, or additions to seasonal arrangements.
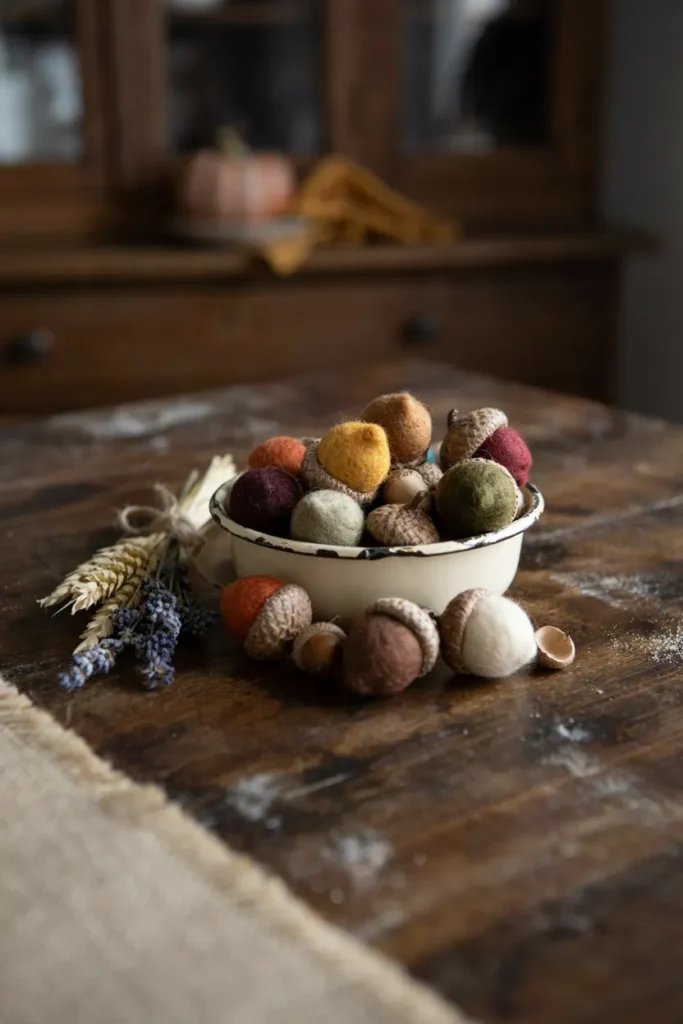
- Create rounded acorn bodies from felt or felted wool.
- Use natural acorn caps when available, or make caps from brown felt.
- Mix rust, mustard, olive, burgundy, brown, and cream shades.
- Make acorns in several sizes to add variety to displays.
Fill a vintage wooden bowl with the finished acorns for an easy fall centerpiece, or combine them with dried leaves, pinecones, and miniature pumpkins. The soft texture adds warmth without making the arrangement feel overly themed.
Upcycled Halloween Boxes and Tins
Give old containers a second life by turning them into decorative Halloween storage. Cookie tins, small wooden boxes, tea containers, and sturdy packaging can become charming seasonal pieces using paint, paper, labels, and vintage-inspired illustrations.
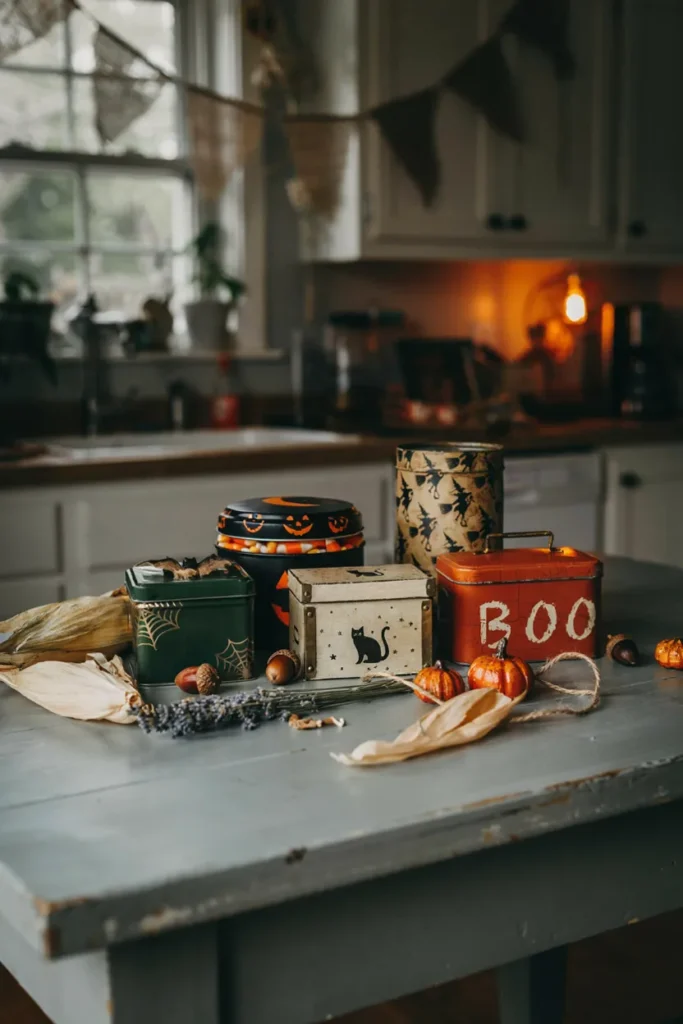
- Start with clean tins or boxes in shapes that are easy to decorate.
- Cover surfaces with paint, patterned paper, or aged-looking labels.
- Add retro pumpkins, black cats, moons, witches, or Halloween lettering.
- Use the finished containers for treats, craft supplies, or small decorations.
Sand or distress selected edges if you want the pieces to appear older, but avoid making every container identical. A collection of different shapes, illustrations, and finishes can look more convincing when arranged together on open shelving.
Bonus Idea: Halloween-Themed Junk Journal
If you enjoy paper crafts, collect your favorite spooky-season scraps inside a handmade Halloween junk journal. Each page can combine decorative paper, illustrations, handwritten memories, envelopes, tags, photographs, and small pieces saved from autumn activities.
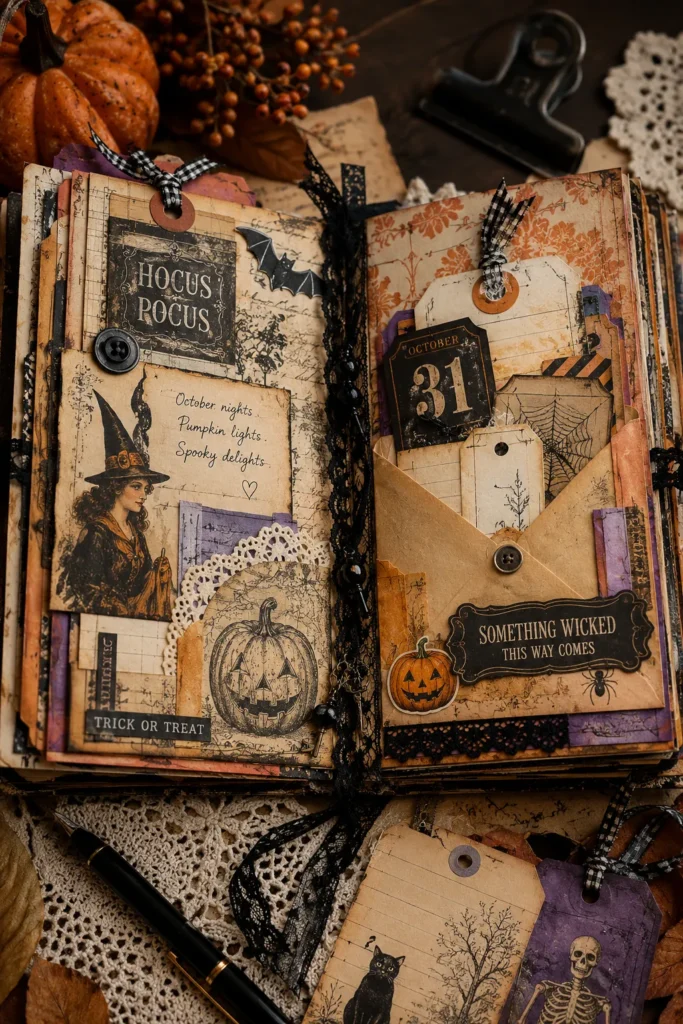
- Use old book pages, scrapbook paper, envelopes, and cardstock for the pages.
- Add pockets for tags, notes, photographs, and tiny keepsakes.
- Decorate with stamps, lace, ribbons, stickers, and vintage-style imagery.
- Leave blank areas for writing down Halloween memories and traditions.
The journal can grow from year to year as you add party invitations, pumpkin patch photos, seasonal recipes, pressed leaves, and other little memories. Over time, it becomes both a craft project and a personal Halloween keepsake.
Conclusion
Vintage Halloween crafts bring together the playful side of spooky season and the cozy textures of autumn. Instead of relying entirely on store-bought decorations, handmade ghosts, paper art, tassels, acorns, and upcycled containers can give your seasonal displays a more personal and collected character.
Choose one project for a quick afternoon craft or combine several ideas throughout your home for a complete nostalgic theme. By mixing retro Halloween imagery with warm fall colors and handcrafted details, you can create seasonal decor that feels charming, quirky, and ready to return year after year.
Frequently Asked Questions
What materials work best for vintage Halloween crafts?
Felt, aged-looking paper, cardstock, yarn, ribbon, lace, air-dry clay, wooden beads, dried leaves, and repurposed containers are useful materials for achieving a vintage-inspired look. Thrifted and leftover craft supplies can also add variation that makes handmade decorations feel less uniform.
What colors should I use for vintage Halloween decor?
Black and orange remain classic choices, but softer shades often create a stronger vintage feeling. Consider faded orange, cream, mustard yellow, charcoal, rust, olive green, dusty purple, burgundy, and warm brown. Slightly muted colors tend to feel more nostalgic than extremely bright shades.
How can I make new Halloween crafts look vintage?
Choose muted colors, textured materials, retro illustrations, irregular handmade details, and finishes that do not look overly polished. Torn paper edges, visible stitching, mixed fabrics, old-fashioned typography, and thrifted frames can also help new crafts feel as though they have been collected over time.
Can vintage Halloween crafts work with fall decor?
Yes. Use pumpkins, acorns, leaves, warm neutrals, natural fibers, and autumn colors as the foundation, then introduce Halloween elements such as ghosts, bats, witches, and black cats. This makes it easier to transition the same display from early fall into Halloween.
Where can I display handmade Halloween crafts?
Mantels, entry tables, bookshelves, kitchen shelves, coffee tables, windows, and dining areas are all useful places for smaller crafts. Garlands can decorate mirrors and doorways, while paper art and framed ephemera can become part of a seasonal gallery wall.