15 Halloween Window Ideas That Look Stylish From Inside and Out
Windows are one of the most visible parts of your home during Halloween, seen by trick-or-treaters, neighbors, and anyone passing by after dark. A well-designed window display can turn a plain pane of glass into a genuine seasonal showpiece, whether you’re going for playful and cute or dramatic and eerie. Best of all, most window decorating projects are quick, affordable, and easy to remove once November arrives.
Below you’ll find 15 Halloween window ideas ranging from simple sticker designs to full painted scenes, along with a quick supply list and answers to a few common questions about window decorating.
Halloween Window Decorating Supplies to Gather First
Before diving into a specific design, it helps to have a few core supplies on hand, since many of these ideas share the same basic materials. Having everything ready ahead of time makes the actual decorating process much faster and less messy.
- Washable window paint or paint markers in Halloween colors.
- Painter’s tape for creating clean lines and borders.
- Reusable window clings or stickers for no-mess options.
- String lights, battery-operated candles, or a small projector for evening displays.
With these basics gathered, you’ll be ready to tackle nearly any of the window ideas below, whether you’re working with a single pane or a full bay window.
Halloween Window Ideas to Haunt the Neighborhood
From painted scenes to glowing displays, these 15 ideas cover a wide range of styles and skill levels, so there’s something here whether you have an afternoon to spare or just a few quick minutes.
Recreate a Favorite Horror Movie Scene in Paint
Painting a scene inspired by a favorite spooky film is a fun way to add a personal touch to your window display. Using washable window paint, sketch out a simple silhouette or iconic image tied to the movie, then fill it in with bold, contrasting colors.
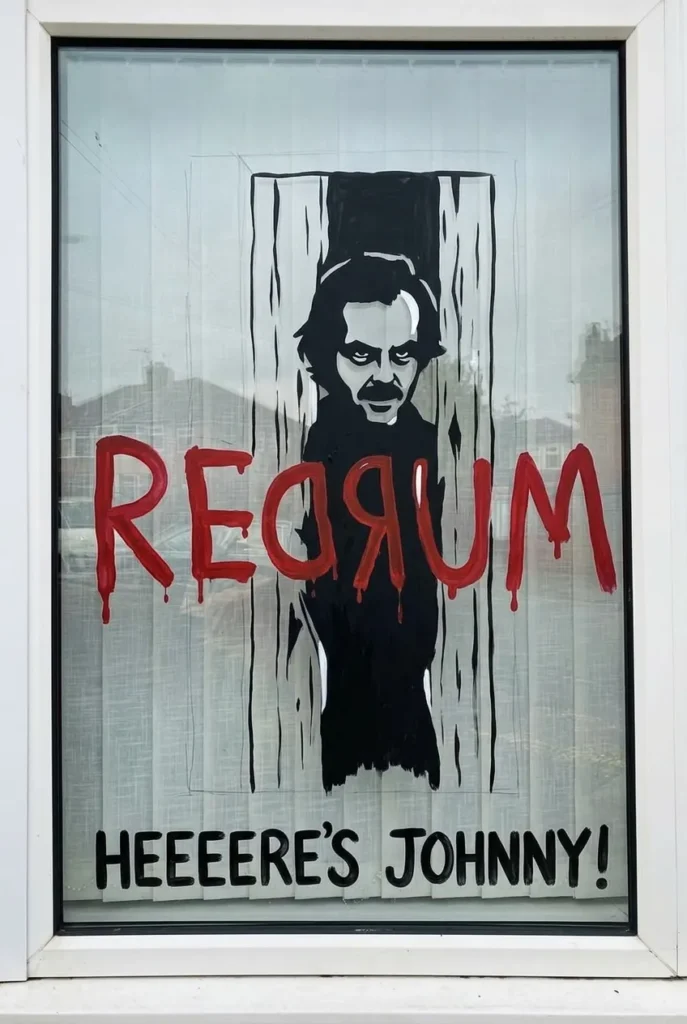
- Sketch your design lightly in pencil or chalk before painting.
- Use bold, high-contrast colors so the design reads well from a distance.
- Keep the image simple enough to recreate confidently in paint.
- Add a small caption or quote beneath the design for extra flair.
This idea works especially well for film lovers who want their display to feel more personal than a generic pumpkin or ghost design.
Write a Custom Greeting on a Chalkboard Sign
A small chalkboard sign propped in the window offers a flexible, easily updated way to share a seasonal message. Whether it’s a pun, a warm greeting, or a countdown to Halloween night, this idea adds personality without any permanent commitment.
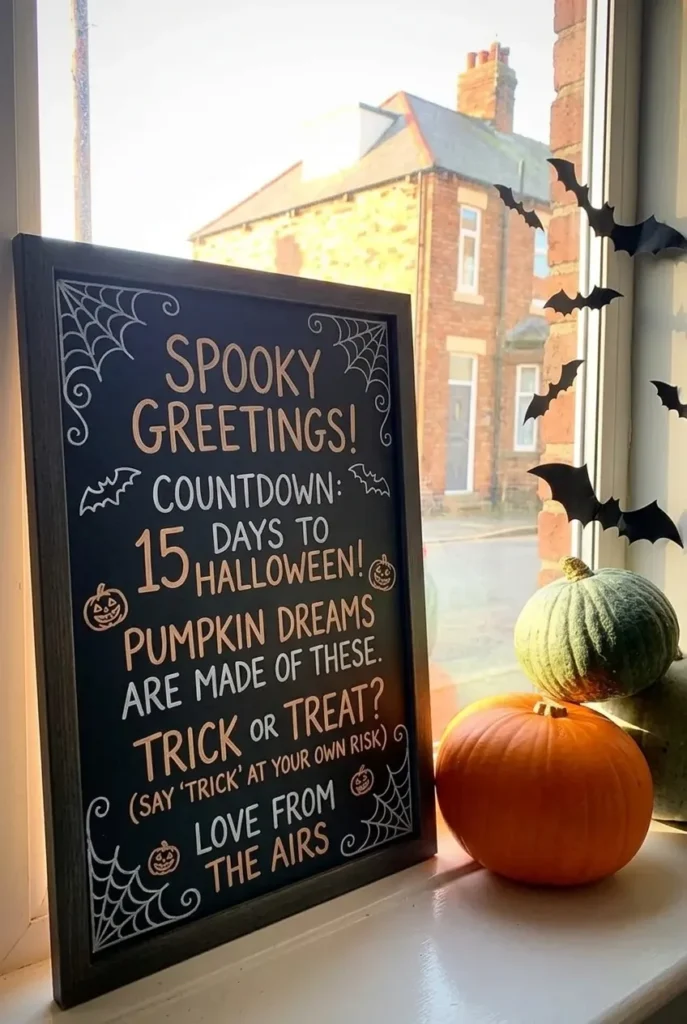
- Choose a chalkboard sign sized to fit comfortably in your window.
- Write a short, playful phrase or countdown message.
- Update the message throughout the month as the holiday approaches.
- Add small chalk doodles, like bats or pumpkins, around the text.
Because chalk wipes away easily, this display can be refreshed as often as you like throughout the season.
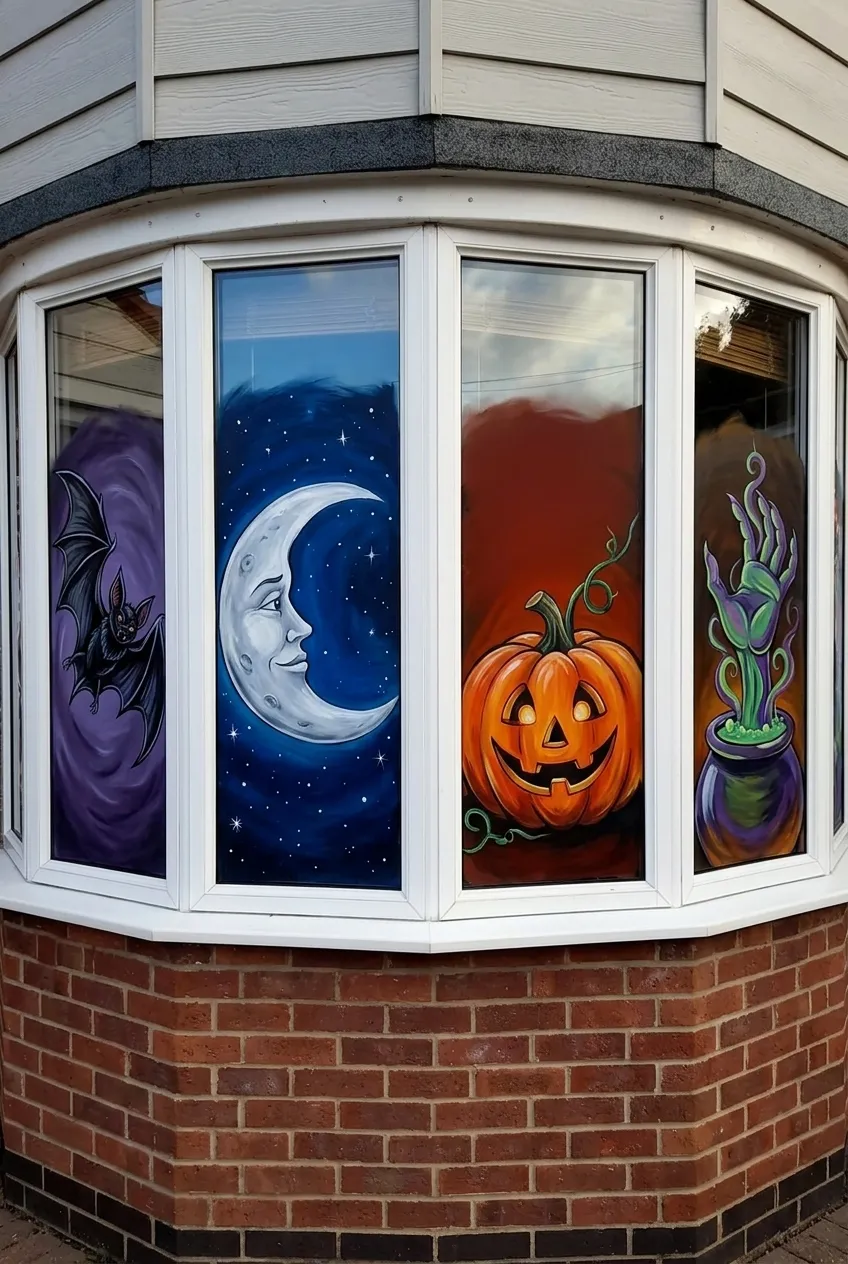
Style Each Pane of a Bay Window Differently
A bay window offers multiple individual panes, giving you the opportunity to create a series of related but distinct designs. Rather than repeating the same image across each section, try varying the motif while keeping the color palette consistent.
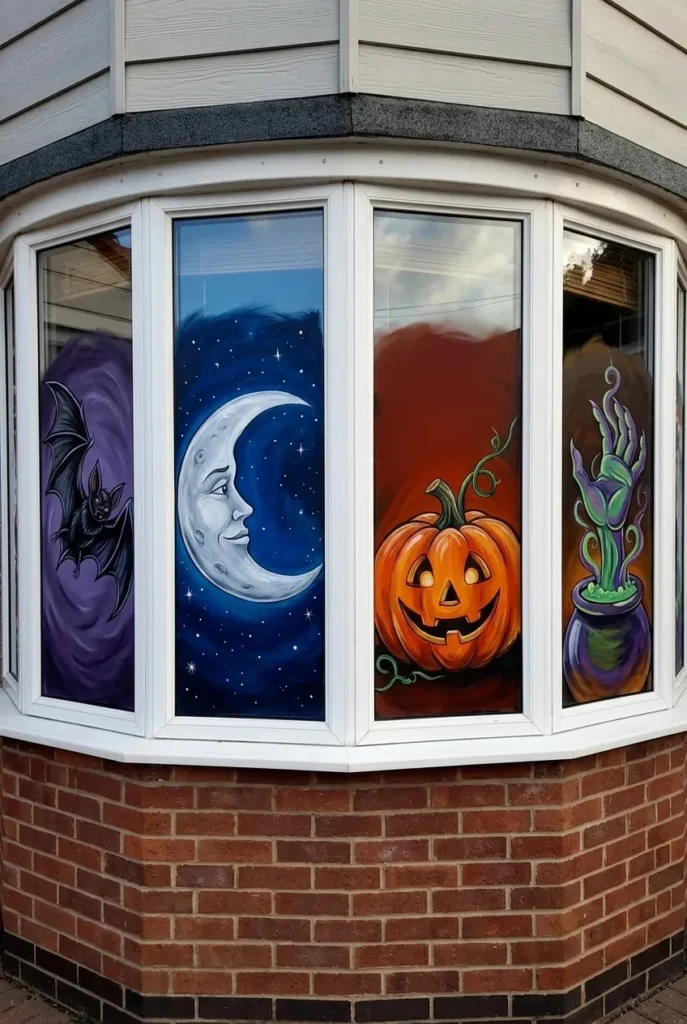
- Assign a different Halloween motif to each pane, like a bat, moon, or pumpkin.
- Keep the color scheme consistent across all panes for cohesion.
- Use painter’s tape to keep each design contained to its section.
- Step back periodically to check how the panes look together.
This approach takes advantage of a bay window’s unique shape, turning it into a small gallery of seasonal artwork.
Trace a Haunted Silhouette Scene
Black silhouette cutouts taped to the inside of a window create a dramatic, shadow-like effect, especially once the lights come on at dusk. A row of bare trees, a witch on a broom, or a haunted house outline all work particularly well for this technique.
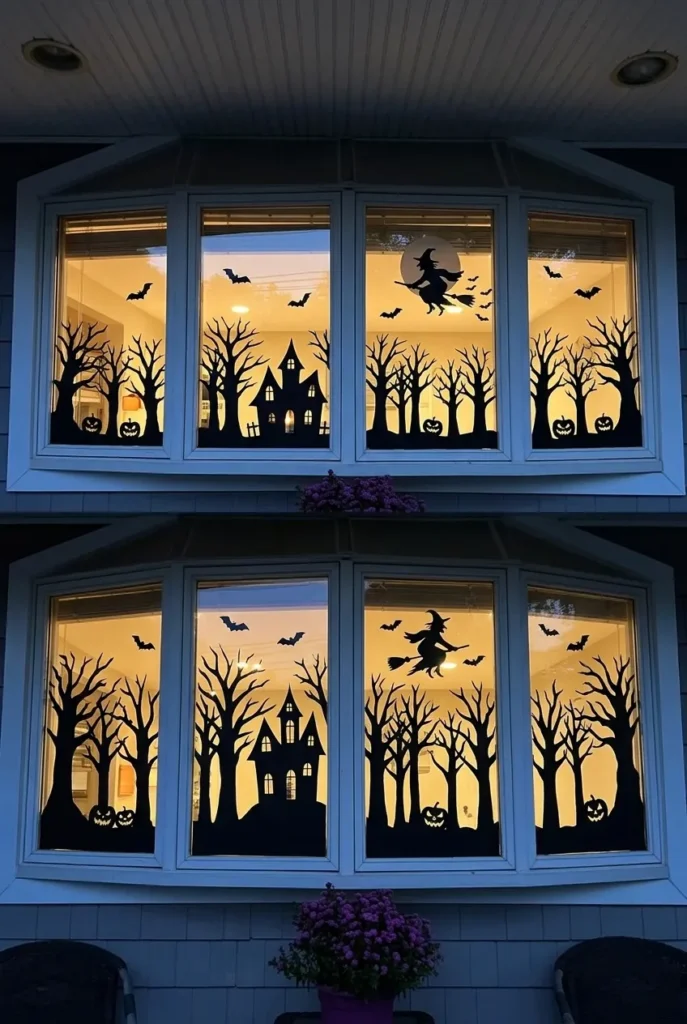
- Print or draw silhouette shapes onto black paper.
- Cut the shapes out carefully along the outline.
- Tape the silhouettes to the inside of the window glass.
- Turn on interior lights in the evening to make the shapes pop.
This effect looks especially striking after dark, when the silhouettes appear to glow against the lit window behind them.
Layer Painted Designs with Bunting and String Lights
Combining a painted window design with physical decor, like fabric bunting or string lights, adds extra dimension to the overall display. This layered approach makes the window feel fuller and more festive than paint alone.
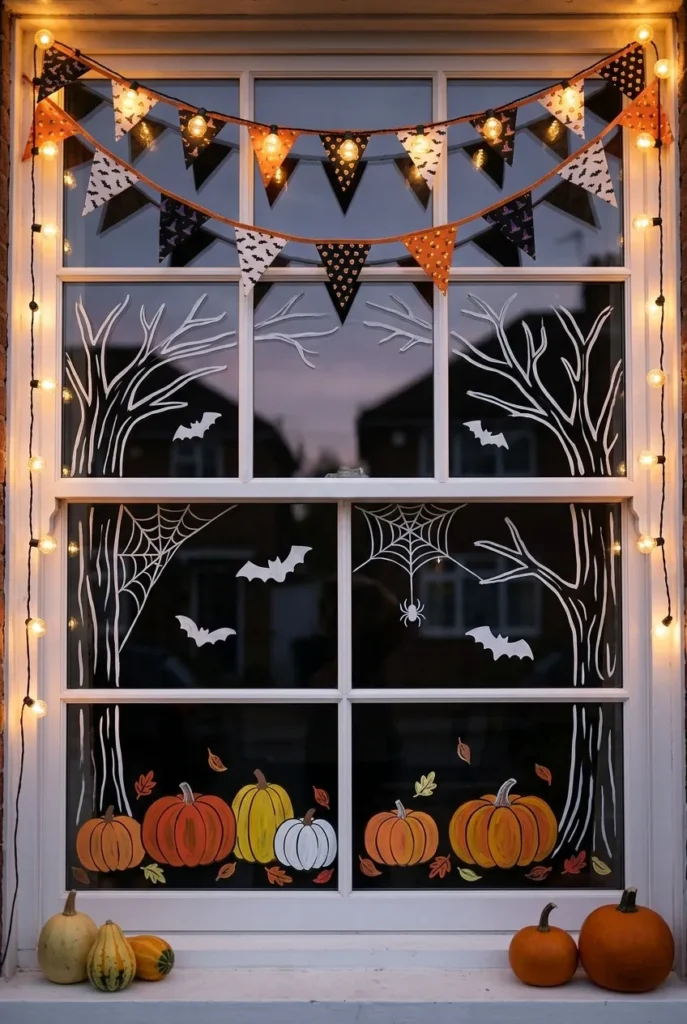
- Paint a simple base design directly onto the window.
- Hang a strand of Halloween-themed bunting along the top edge.
- Add string lights around the frame for evening ambiance.
- Keep the paint design simple so it doesn’t compete with the added decor.
This combination works well for anyone who wants their window to feel decorated both day and night.
Feature One Bold Halloween Slogan
Sometimes the simplest window designs make the biggest impact. Painting a single bold word or short phrase, like “Boo” or “Trick or Treat,” in large lettering creates an eye-catching display without requiring detailed artwork.
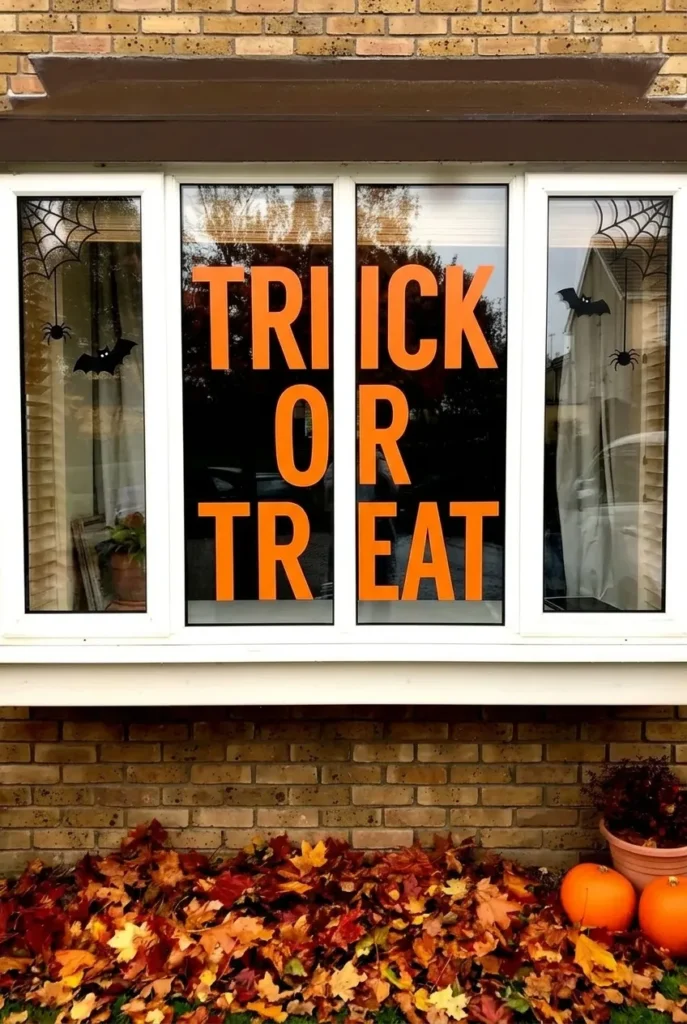
- Choose a short, punchy phrase or single word.
- Use painter’s tape to keep lettering clean and even.
- Select a bold color that stands out against your window frame.
- Add a small icon, like a spider or bat, beside the text if desired.
This idea is especially beginner-friendly, since lettering requires less artistic skill than a full illustrated scene.
Paint a Classic Pumpkin and Ghost Duo
A traditional pumpkin paired with a friendly ghost remains one of the most recognizable and reliable Halloween window designs. This combination works well for nearly any home and appeals to trick-or-treaters of all ages.
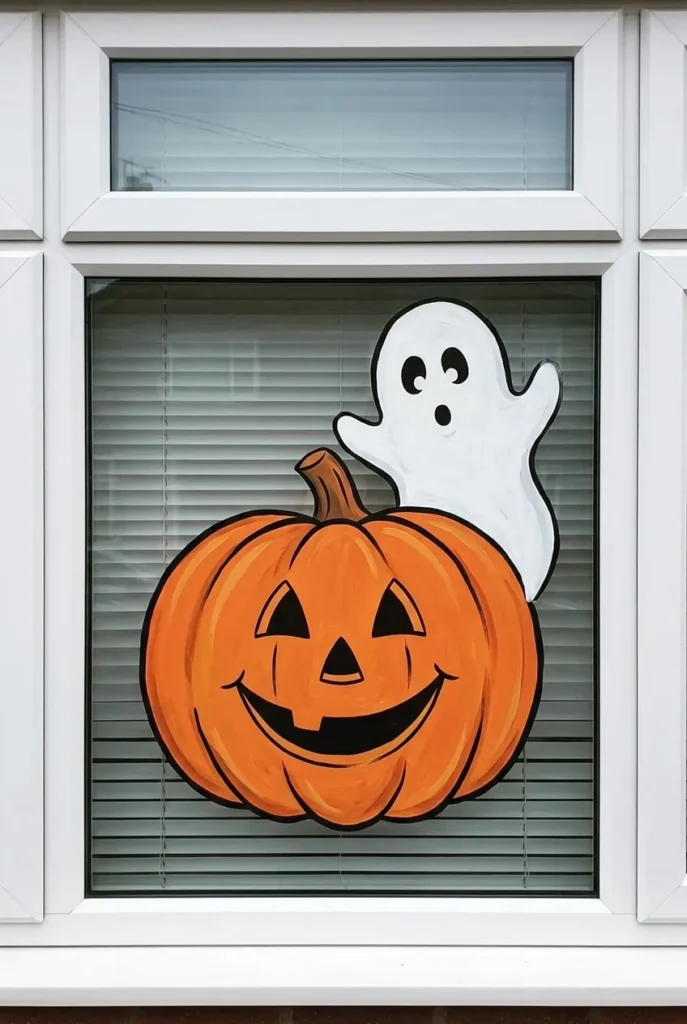
- Sketch a simple pumpkin and ghost outline before painting.
- Use orange for the pumpkin and white for the ghost.
- Add black details for facial features and shading.
- Keep the design centered so it’s visible from the street.
This classic combination is a safe, crowd-pleasing choice for anyone new to window painting.
Mix and Match Removable Window Stickers
For a no-paint option, reusable window clings and stickers offer a mess-free way to decorate. Combining different sticker sets, like bats with spiderwebs or pumpkins with stars, lets you build a custom design without any artistic skill required.
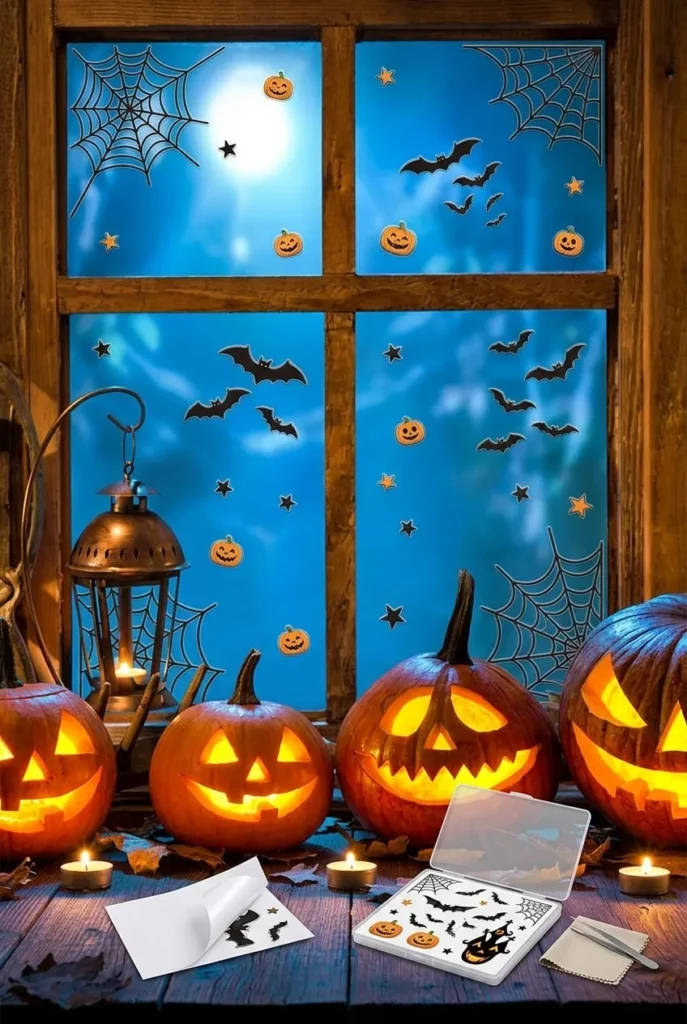
- Choose a few coordinating sticker sets in similar color tones.
- Arrange stickers in a balanced pattern across the window.
- Leave some open space so the design doesn’t feel too crowded.
- Remove and store stickers for reuse in future years.
This method is ideal for renters or anyone who wants an easy, damage-free decorating option.
Welcome Guests with a Friendly Ghost Cutout
A large, cheerful ghost cutout placed in a front-facing window greets trick-or-treaters with a welcoming, non-threatening design. This idea works particularly well for households wanting a cute rather than scary Halloween theme.
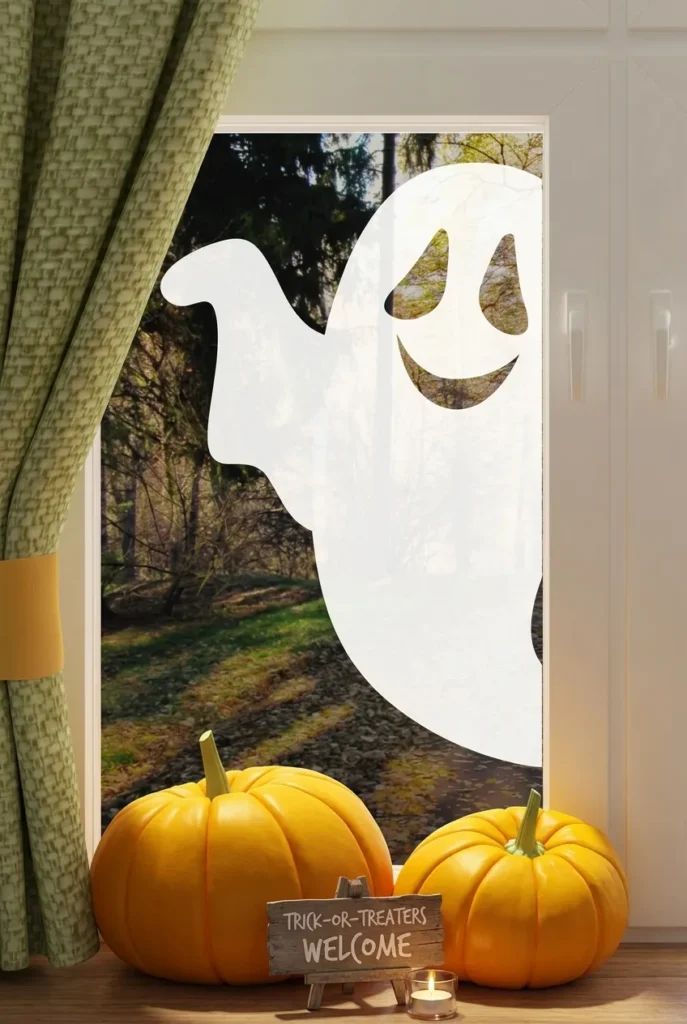
- Cut a large ghost shape from white paper or fabric.
- Add simple facial features for a friendly expression.
- Position the ghost at a visible height in the window.
- Pair with a small welcome sign for trick-or-treaters.
This design is especially popular for households hosting younger trick-or-treaters who might be sensitive to scarier imagery.
Add Smiling Spiders to a Kid’s Window
For a child’s bedroom window, playful spiders with smiling faces bring Halloween fun without any of the fright. This design is easy to recreate with paint, stickers, or simple paper cutouts.
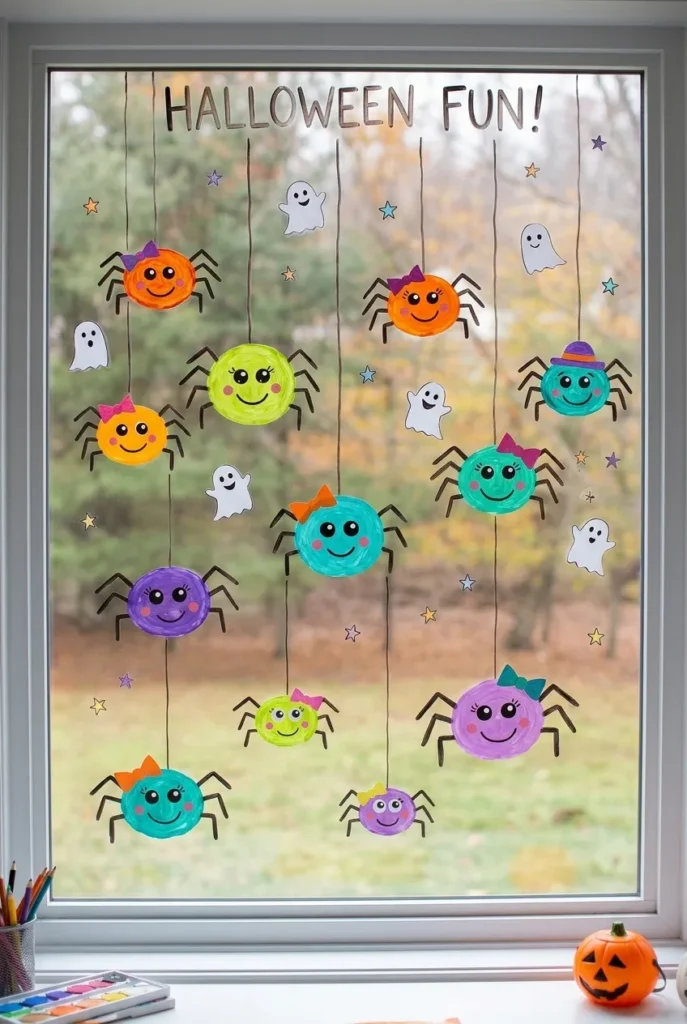
- Draw or trace simple round spider bodies.
- Add smiling faces and small dot eyes for a friendly look.
- Use bright, cheerful colors rather than traditional black.
- Scatter a few spiders across the window at varying sizes.
This lighthearted approach makes Halloween decorating enjoyable for kids without introducing anything too spooky into their space.
Stretch an Oversized Cobweb Across the Glass
A large stretchable cobweb draped across a window instantly creates a classic haunted house effect. Adding a plastic spider or two within the web enhances the eerie atmosphere even further.
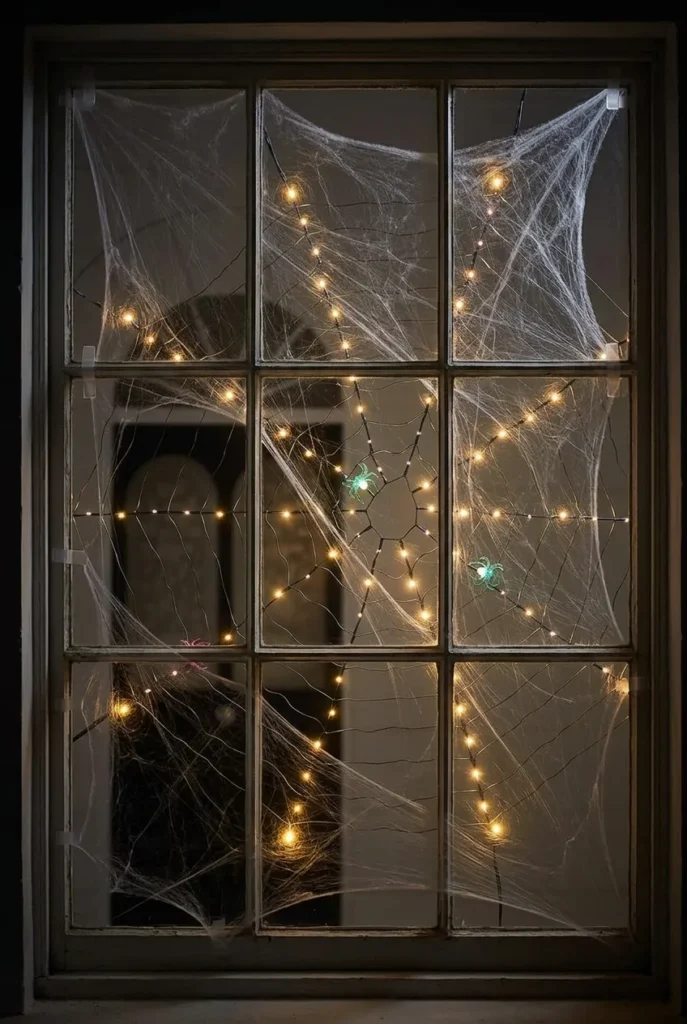
- Stretch the cobweb material thin for a realistic texture.
- Secure the edges to the window frame with removable adhesive.
- Add one or two plastic spiders within the web design.
- Combine with soft lighting behind the web for added drama.
This is one of the fastest ways to transform an ordinary window into something that feels straight out of a haunted house.
Add a Few Understated Bat Decals
For a more subtle nod to the season, a small scattering of bat decals across the corner of a window adds just enough Halloween spirit without overwhelming the display. This understated approach suits homes that prefer minimal seasonal decor.
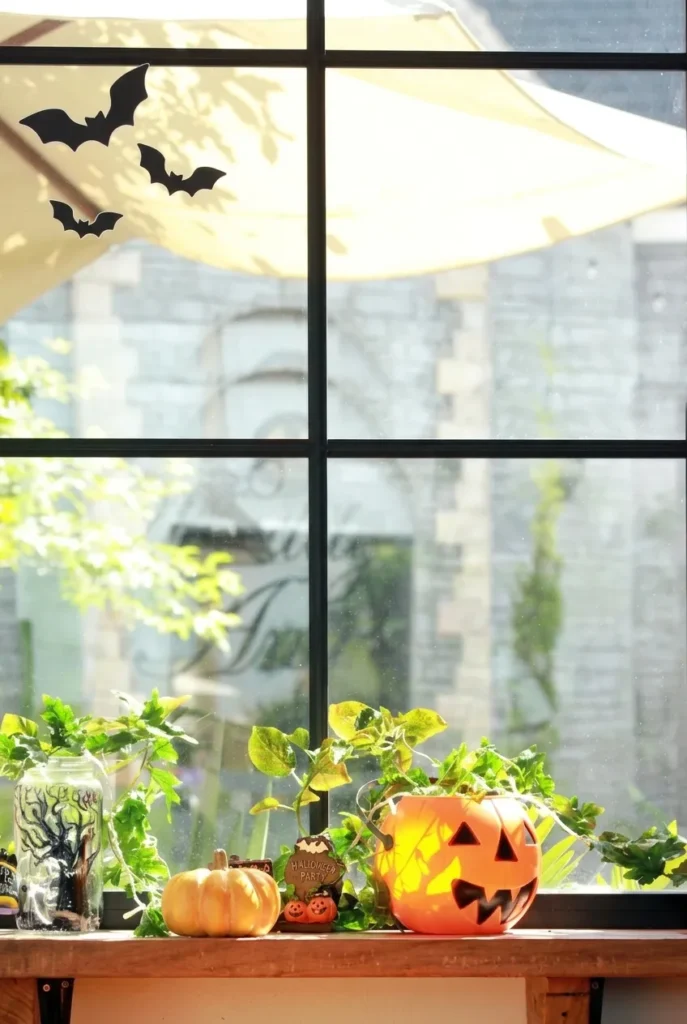
- Choose small bat decals in matte black.
- Apply them in a loose, scattered pattern near one corner.
- Vary the size and angle of each bat for a natural look.
- Keep the rest of the window free of additional decor.
This minimal approach proves that even a small design detail can successfully signal the season.
Illuminate the Window with a Light-Up Ghost
A light-up ghost decoration placed in the window creates a soft, glowing display that’s especially effective after sunset. This option combines the charm of a ghost design with the added visual impact of built-in lighting.
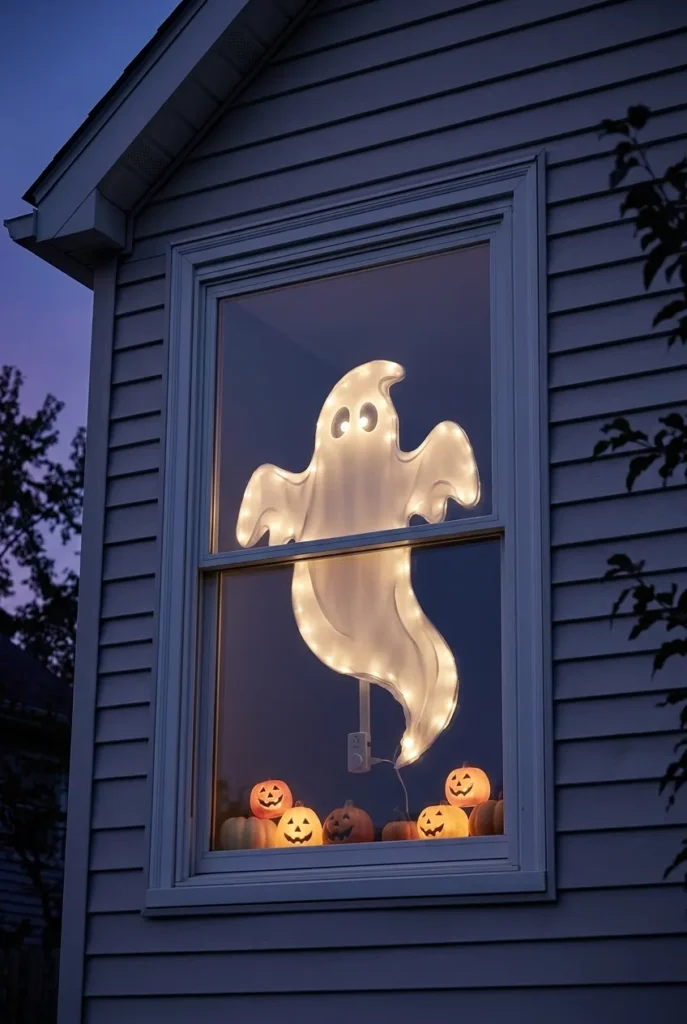
- Choose a light-up ghost decoration sized for your window space.
- Position it at a visible height facing the street.
- Use a timer so the light turns on automatically each evening.
- Pair with a few smaller glowing accents nearby for extra ambiance.
Because the design lights up on its own, this idea requires very little daily maintenance once it’s in place.
Bring the Window to Life with a Video Projection
A window projector displaying moving Halloween imagery, like flickering ghosts or swirling fog, creates one of the most dramatic and attention-grabbing displays possible. This tech-forward option turns your window into a genuinely animated scene.
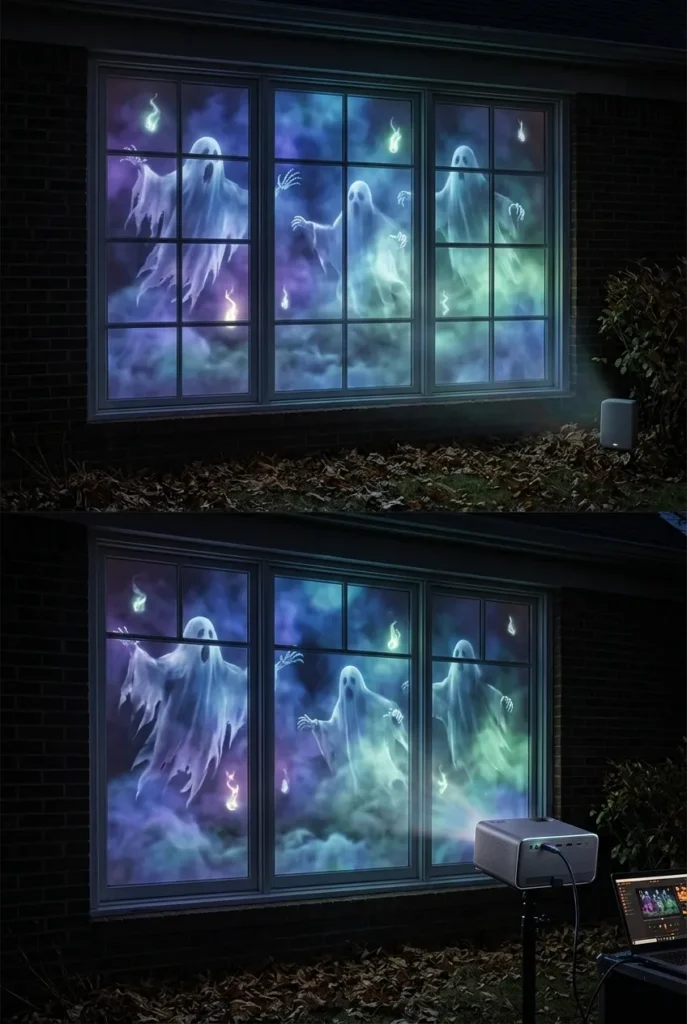
- Choose a Halloween-themed projection video or loop.
- Position the projector at the correct distance for your window size.
- Test the display after dark to check visibility and placement.
- Combine with sound effects for an even more immersive experience.
This option requires a bit more setup than other ideas here, but it consistently delivers one of the most memorable results.
Line the Sill with a Row of Glowing Jack-o’-Lanterns
Placing a row of small battery-operated jack-o’-lanterns along the windowsill creates a warm, glowing display visible from outside once it gets dark. This simple idea pairs beautifully with any of the painted or sticker-based designs above.
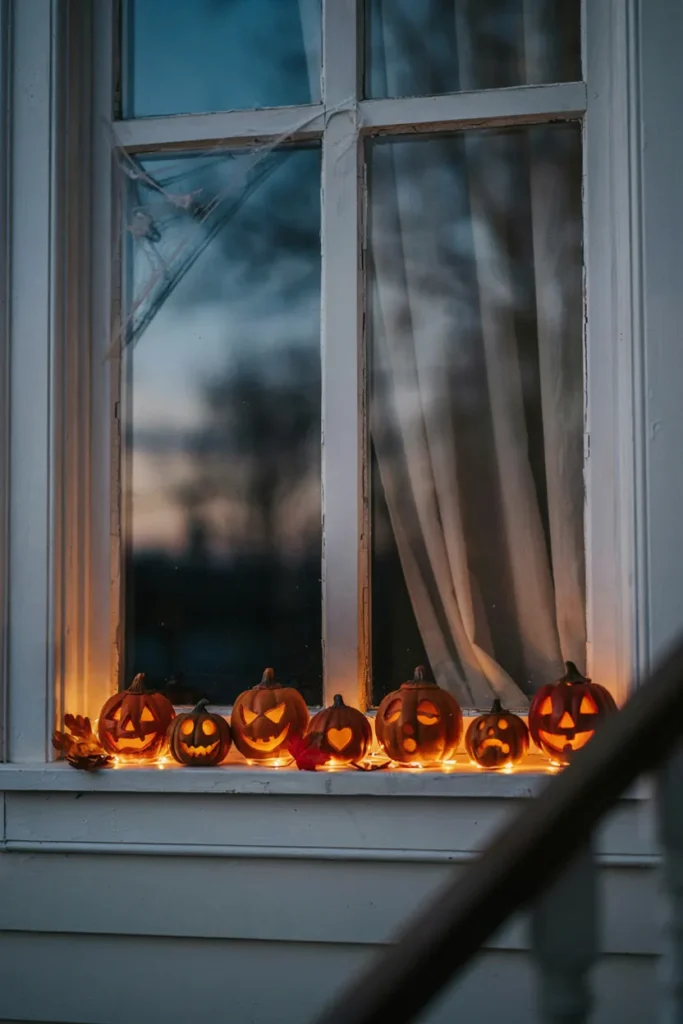
- Choose battery-operated pumpkins for a flame-free glow.
- Line them evenly along the windowsill.
- Vary the sizes slightly for a more natural, collected look.
- Set lights on a timer for consistent evening illumination.
This finishing touch adds warmth to the display and works well as a complement to a larger painted or projected scene above it.
Conclusion
A well-decorated window can transform the entire exterior look of your home during Halloween, whether you choose a dramatic painted scene, a simple sticker design, or a glowing light-up display. From playful, kid-friendly motifs to more elaborate projected scenes, these 15 ideas offer something for every skill level, budget, and style preference.
Frequently Asked Questions
What color should I paint my window for Halloween?
Classic Halloween colors like orange, black, and white tend to work best because they’re immediately recognizable and read well from a distance, even in daylight. That said, adding an accent color like deep purple or green can help your design stand out from more typical orange-and-black displays while still feeling clearly seasonal.
How can I add texture to my Halloween window ideas?
Layering different materials, such as combining painted designs with fabric bunting, stretchable cobwebs, or dimensional stickers, is one of the easiest ways to add texture beyond flat paint alone. Mixing matte and glossy paint finishes within the same design can also create subtle textural contrast without introducing any new materials.
How can I decorate Halloween windows without paint?
Removable window clings, stickers, silhouette cutouts, and hanging decorations like cobwebs or light-up figures are all excellent paint-free alternatives. These options tend to be faster to apply, easier to remove, and better suited for renters or anyone who wants a completely damage-free decorating method.